
FLYING A HELICOPTER
First of all, there is a common misconception that helicopters can fly straight up and down with ease. While it is true that to even get airborne (under normal conditions), the helicopter must first come to a hover, it is among the most difficult and power intensive maneuvers to perform.
The helicopter’s rotor blades, like an airplane’s wing, are airfoils that produce lifting force. While the airplane must pull itself and its wings through the air to produce lift, the helicopter spins its wings around at great speed. Seems simple, and a good idea, but that is the only easy part to controlled flight in a helicopter. In order for a free standing body to spin something, it must endure an equivalent opposing force. When the helicopter turns its rotor under a load or increases RPM, its fuselage is forced to turn in the opposite direction. Ob boy!…we can’t fly that way! Hmmm… Well, there are bunches of ways to counter-act torque, but the most common (read most difficult on the pilot) way is to put a tail-rotor on it. It rotates at a speed proportional to the main rotor and its thrust is adjusted as needed by changing the pitch angle of its blades. The pedals perform this function. So, when we want to yank this bird off the ground, we’d better add a goodly amount of left pedal at the same time, or we’ll turn this helicopter into a very expensive and disposable merry-go-round. No thanks.
Anyway, now that we know how to hold a heading, we’re ready to “yank” this thing off the ground, right? By the way, what do we yank on to do that? Well, unlike in the movies, we don’t just crank the engine up until we go up. We very gently twist the motorcycle-type throttle on the end of the stick to the left of the seat. You bikers will find that it won’t turn the way you’d expect. You’ll see why in a minute. That stick–called the collective–is hinged at the back and moves up and down, but leave it in its lowest position for now.
The collective changes the pitch of all the main rotor’s blades equally and simultaneously. Pull it up for more lift, down for less. With pitch comes drag, so we must add throttle when adding pitch. Likewise, a reduction
in power is needed when pitch is reduced, or the rotor will overspeed and shed a blade or two. (we need those)
O.K. We’re almost ready…almost. Once we pull pitch, add power, and add left pedal to keep from becoming dizzy, we are likely to find ourselves in a hover. It won’t be pretty, but if we remember to coordinate collective, throttle, and anti-torque pedals, we’ll be hoverin’ over one spot on the ground, right? Well, not for long, I’m afraid. The wind, any imbalance of the aircraft, and the tail-rotor’s thrust will send us off who knows which direction. (I knew that tail-rotor would be trouble)
Well, we need another “stick”, so we’ll put it right here between our legs. (seems natural enough, and we’ll need a pacifier amidst all this confusion) This one will change the pitch of the blades at certain points in their
rotation, or cyclicly. Its effect is to add lift to one side of the rotor system and decrease it on the opposite side, thereby tilting the whole rotor disc in the desired direction of travel.
We won’t get into a thing called “gyroscopic precession” right now, but suffice to say that we’ll have to be careful to set the mechanism that tells the rotor blades when to change pitch (swashplate) so that if we push forward on the new stick–the cyclic–we get forward tilt on the rotor. Assuming we have a powerful enough engine to overcome the weight of the machine and the drag of the fuselage and other “parasitic” components plus the significant amount of power needed to operate the tail-rotor, we should be good to go.
Engine running at idle and rotor clutch engaged, we need to slowly bring the rotor to takeoff RPM–typically around 450 in a small bird. It takes very little power to do this with no pitch on the blades, so we have gobs of throttle left, even though we can’t hear ourselves think already. (headsets are not optional in helicopters). Now, carefully and very slowly raise the collective until you notice the RPM start to fall. This shouldn’t take long. Add just enough throttle to bring the RPM back up. You soon realize that you can raise the collective and add throttle in the same movement–sort of like doing a curl with your forearm. Now that we’re getting light, we have to make sure that the cyclic is centered at an equilibrium of lift around the rotor disc, and that the tail-rotor is also equalizing torque–no more, no less. We want to maintain this equilibrium at least until we are in a hover and decide to go some-where. If the tail-rotor is producing to much/too little thrust, we will start to spin, which can induce other problems. 🙂 If the main rotor is not in equilibrium, we can strike the tail-rotor on the ground or even roll over. You sure you want to do this? O.K. Here we go!
As soon as we get off the ground we notice a tendency for the helicopter to drift to the right due to the tail-rotor’s thrust, so a little left cyclic *pressure* is necessary to stay over one spot. I say pressure because that’s all it takes. Much more than that and the helicopter will go too far to the left and slip off the “cushion” of high-pressure air it is producing under the rotor and will settle to the ground if power is not added. Not only that, but a series of pilot-induced oscillations on all axes may develop. Let’s say that we move the cyclic to the left to correct for tail-rotor drift, and have to suddenly move it back to the right to correct for the over-correction. Now we find ourselves swinging back and forth to an increasing and alarming extent. This is due to the helicopter’s mass acting as a pendulum under the spinning rotor, which tends to stay put much like a spinning top. This is appropriately called “pendular effect”. Not to over-complicate things, but pendular effect is not the worst thing to deal with when in a hover. Let’s say that we experience tail-rotor drift and correct for it using left cyclic pressure. Although the rotor is still producing the same amount of thrust, we have just converted some of that lifting thrust (called “lift component”) to lateral thrust (“thrust component”) by tilting the rotor disc slightly. To avoid settling to the ground, we must add some lift component by adding collective and simultaneously adding enough throttle to maintain rotor RPM. While doing that we notice that the nose of the helicopter wants to go to the right due to the increase in torque, so we add some left pedal pressure, which stops the nose from moving, but since the tail rotor needed more power to do that, and it doesn’t have its own engine, we had to steal some power from the main rotor. (Ya faller me?) Now that the rotor has less power, the helicopter wants to settle to the ground again, so we need to add more collective and more throttle and more pedal… now you’re too high! Uh oh! Less collective! Less power! Right pedal! Now you’re drifting to the left due to less thrust from the tail rotor! Watch that rotor RPM! Better get outa this hover and away from the ground where its safe!
Now here’s the fun part. Gently feed forward cyclic pressure and simultaneous collective/throttle (and don’t forget left pedal) until we begin to gain forward speed. Now we just lost two good things:
Ground effect, which is that cushion I mentioned, and lift component since we tilted the rotor forward. Just add some collective/throttle to keep from digging a hole, and the appropriate amount of pedal to hold heading. We quickly gain forward speed until we gain a good thing to replace the two good things we just lost: translational lift. Translational lift is what people are referring to when they say that a helicopter’s rotor system acts like a wing in forward flight. Kinda sorta, but not exactly. It *flies* much the same but not because of wing-like properties. It is simply because the helicopter now has a constant supply of “still” air to climb upon, rather than sitting in its own accelerated column of air. We can either choose to nose over a bit more or reduce power and stay near the ground to accelerate some more, or let the helicopter climb with its newfound extra rotor efficiency–its your choice. (O.K., we skimmed the ground ’cause its fun.) Now we need to get over those trees…c’mon, that’s enough! Now, ease back on the cyclic enough to maintain good climb speed and up we go like that Ferris wheel you used to hate so much.
The easiest part of all needs little explanation. Just do all the same stuff you do in an airplane plus watch your rotor RPM. When you want to turn, give it a little pedal to coordinate. Hold speed by holding *attitude* with the cyclic, hold altitude with the collective. Easy, huh? There’s a little more to it, but you might not notice it while in flight. Some things change with speed, and some mostly sub-conscious corrections need to be made, but there are limits to sub-conscious flight techniques. The following paragraph is optional reading for those who only want a very basic explanation of helicopter flight. (this involves math) 🙂
Due to the rotor spinning rapidly, and the helicopter as a whole moving forward, we have to deal with “dissymmetry of lift”. Dissymmetry of lift comes from one side of the rotating rotor disc moving into the direction of travel of the helicopter, and the other side moving away from it. The net effect is to add the speed of the helicopter to the rotor’s rotational speed on the advancing side, and conversely to subtract the forward speed of the helicopter from the retreating side of the rotor. If the rotor has a rotational speed of 400 MPH at the tips, and the helicopter is traveling at 100 MPH through the air, the net speed of the advancing side of the rotor is 500 MPH. Under the same conditions, the net speed of the retreating side is 300 MPH. If an airplane tried to run its right wing through the air at 500 MPH and run its left wing through the air at 300 MPH, it would be doing snap-rolls until it crashed. Dissymmetry of lift is the primary obstacle the helicopter faces in significantly improving on current top speed records. Above the approved top speed of a helicopter, the rotor blades are alternately experiencing the extremes of Mach buffet, and of reverse flow…450 times a minute. The resulting rapid oscillation of center of pressure on each blade can lead to catastrophic rotor system failure. The vibration is a warning. The control effect as speed increases is that the helicopter rolls towards the retreating side, and is corrected by adjusting cyclic pressure against the roll. This is done without much thinking except to re-trim the cyclic when speed changes significantly. Another change that isn’t really noticed is that the tail-rotor doesn’t need to work as hard at higher speeds due to the weather vane effect of the tail boom. Airfoils are often placed on the boom to unload the tail-rotorat high speed/high power settings and free up power for lift/thrust.
This is boring, so now we’re going to land somewhere…anywhere. See any place you want to stop and have a picnic? How ’bout that little pond with the ducks and the waterfall tucked into that gorge? Let’s land on that sand bar. This is one place where those fixed-wingers won’t bother us.
Losing speed and altitude is basically the reverse process of gaining them. To hold altitude and lose speed you ease back on the cyclic to flare and reduce speed while lowering collective/throttle just enough to hold altitude and maintain rotor RPM. To lose altitude without losing speed, lower collective/throttle until the desired rate of decent is reached. A combination of both is usually used for approach to landing. At the point of loss of translational lift, the rotor system will vibrate a bit, but you’re used to it by now (you’ll be a bit numb by the end of the flight). Besides, you’ll be somewhat distracted by the sinking feeling, followed by the confusion of having the nose suddenly jerk to the right when you yank up on the collective to stop sinking. (forgot that left pedal again, eh?) Anyway, when you’ve established a hover (hopefully in ground effect and over a clean, level spot) you can decrease collective until touching the ground. That was an over-simplification, but you get the idea. Now we can eat. Don’t freak out too badly when you notice those wires are close, but hey, you’re alive!
To further complicate matters, there are a great number of less-than-routine modes of flight as well as some downright unacceptable ones:
- Autorotation
- Running takeoff and landing
- Pinnacle operations
- Low rotor RPM
- Tail rotor failure
- Settling with power
There also exists many different ways to build a helicopter. Some various rotor types and configurations:
- Fully articulated (three axes)
- Semi-rigid (flexing)
- Teetering (bell type)
- Single (with tail-rotor)
- Tandem (Vertol)
- Coaxial (Soviet Kamov)
- Intermeshing (Kaman)
- NoTaR (no pesky tail-rotor)
Uh… Now do you get the idea??
Author unknown
(Editor’s note: I think the intended idea, or principle is that you should NEVER fly without proper instruction. Ultralight helicopters can kill just as easily as a “Big” helicopter can, if not more so. NEVER FLY WITHOUT PROPER TRAINING! This stuff in the above article cannot be learned on your own!
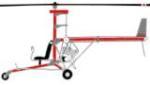
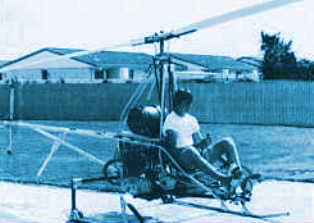
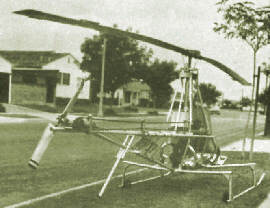
Build and fly a helicopter from our plans!
Comments on this entry are closed.